Restore Damage Photo with Photoshop

0917_Restoration_Preview200

How to Restore a Heavily Damaged Photo With Photoshop

While Photoshop is a great tool to enhance or modify digital images, it is also a fantastic application to repair or restore photographs damaged by the effects of age, neglect, or acts of nature. In this tutorial, we will show you how to restore a heavily damaged photo in Photoshop. Let’s get started!

Tutorial Assets

You will need the following photo to complete this tutorial. Please download it before you begin. If it is not available, you will need to find an alternative.

Step 1

OK so here is what we have to work with, I searched for the most extreme, messed up photo to work with so we can really put our restoration abilities to the test.

Step 2

Let’s start by selecting each piece with the Lasso Tool and copy and paste each on to a separate layer, so we end up with four layers; hide the original.

Step 3

Then for each layer we will create a mask and with a sharp brush of your choice we will start masking off the edges of the actual image. I prefer the 23px Chalk Brush yet its up to you; and the size varies as needed.

Step 4

Before we start masking off we will setup a layer below the one we will start working on and fill it with a deep blue to assist us visually in where and how much to mask.

Step 5

Start masking along the edge of the image getting rid of everything around it.

Step 6

Repeat the process for all the other pieces until you have them as shown here. We don’t need any ripped paper or the white border of the photo, so masking in detail as shown will help you through the next step.


2. Puzzle

Step 1

One of the easier steps is to put the puzzle together, be sure to take your time and try to match the edges of each piece together, by moving and rotating the pieces. You might be tempted to distort or scale certain piece to make it fit, although I advise you not to do that.

Step 2

Move and match as much as you can, getting all the pieces together without overlapping content.

Step 3

Once you have all sections in place, make a group and then make a duplicate of that group for safe-keeping.

Step 4

Finally, just merge the group on top and hide the other, then you are ready for the next step.


3. Rips and Cracks

Step 1

Time to step into the restoration section, and we will do this by using the Clone Tool creatively to start getting rid of all the scratches and tears in our photo.

Step 2

Use the clean sections to repair where the damage is, taking care to not build up repetitive patterns.

Step 3

Treat each section as a separate item in need of repair zooming in and changing the brush size as much as needed.

Step 4

Be patient and take the time to eliminate those tears in the best possible way; at this point I suggest you don’t go in deeper detail and just clean out the obvious damage.

Step 5

If you find something that needs more detail, just leave it for later stages of cleanup.

Step 6

Piece by piece you will start seeing your image come back to life.

Step 7

And here is one section that I decided to leave for later since its quite important and has severe damage; the face of the child. So just clean around it and leave it for later where we can look for solutions and take more time on it.

Step 8

And here we find yet another bump in the road, the bends and wrinkles on the paper, since this is not a scanned image but rather a digital photo of the original, we have some light shining and reflections on the paper that we will also need to treat separately. Of course all this can be avoided if you receive the photo for restoration and scan it properly. Also this stage seems quite easy on paper, yet cloning away all the damage takes hours of detailed creative cloning, so be patient and work through it.


4. Repairing Important Areas

Step 1

Now it is time to treat the more complicated sections that we skipped over such as the back of the bike. Since the original was torn off and bended, in this section we have to reconstruct the those areas, if possible, the client can provide other photos where you can see the bike completely, in this case, we will have to use our best guess.

Step 2

One of the most important parts of the restoration its to fix the child’s face, and do it without altering the face features; so set your brush very small and if needed fix pixel by pixel until you clean the whole area. Remember, that this is only stage 2 of the restoration so leave minor details for later on.


5. Bends and Shadows

Step 1

Time to turn our image back into black and white, even if the client wants it sepia, it’s better to make it black and white, recover the shades and contrast and then, at the end, tone it back to sepia. So apply a black and white adjustment layer clipped to the restoration layer as shown here.

Step 2

Duplicate the layers as shown and hide the originals, again for safe-keeping.

Step 3

Merge the duplicated layers.

Step 4

Now we will use the Color Range Tool to make a selection of the bends that are reflecting environment light and shining off the paper on the darker sections.

Step 5

Once you have the selection apply a Feather of about 5 pixels.

Step 6

Then select the Burn Tool and make sure the settings on the top bar are set as shown here.

Step 7

Then, burn it until those areas match the rest of the shadow area on the photo, with a very soft big brush.

Step 8

We also have this section over the fuel tank that is bended and reflecting light killing the shadow below the arm, so using the Burn Tool and a bit of cloning we also need to reestablish this shadow back.


6. Crop and Heal

Step 1

Let’s start this step by cropping the image as shown, trying to keep as much of the original content as possible.

Step 2

Now it’s time to use the Spot Healing Brush to get rid of some spots. I am sure you were tempted to use it earlier, yet this tool does not help in the early stages of a restoration, and actually messes things up. There is no shortcut in restoration, there is detail and patience. Yet at this point we are OK to use this tool.

Step 3

We have to identify the spots that are part of the damage and keep the details that are part of the image, so be careful.

Step 4

We can also find sections such as this one where neither the Clone Tool nor the Spot Healing Brush can help and we have no other choice but to paint detail back.

Step 5

So select your Brush Tool with this brush tip at only 1px in size.

Step 6

Sample highlights from the plate and carefully start rebuilding the section cable shown here.

Step 7

Then, sample shadow color from the image and finish building up the cable.

Step 8

We have successfully painted back a section completely missing from the image.

Step 9

Let’s continue with some other sections, whenever possible use the detail in the image to restore the sections, leave the painting just for sections that are beyond repair. In this case, the affected wheel can be restored using sections of the wheel that are not damaged.

Step 10

Let’s go into the wheels and remove the wrinkles found there. In the same way, cover all the image finding these types of details that need fixing.


7. Noise Reduction

Step 1

We will now use the Reduce Noise Tool to get rid of the minute particles and specks all over the image.

Step 2

Let’s make a duplicate of our working layer and apply the settings as shown here. Be careful not to go overboard with this tool because you can eliminate details from the image instead of just unwanted noise and specks. Although experimentation and learning about this tool its a good idea and that is why we are working on a duplicate of the layer to avoid messing our work so far.


8. Final Face Fixing

Step 1

The final touch on our image is fixing the lip that was way too damaged; we will use the other section of the mouth to restore the detail and fix his right lip.

Step 2

Using the Lasso Tool, select a section from the right lip and copy and paste it on to a new layer.

Step 3

Flip the section horizontally and rotate it into position as shown here.

Step 4

Then distort it into position as shown here.

Step 5

Use the Burn Tool to bring the shading down, effectively rebuilding the mouth,

Step 6

And then just finalize this step by merging both layers back together and bringing us very close to finalizing our restoration.


9. Final Detailing

Step 1

We have small specks and dust yet to clean up so we can go back to the Spot Healing Tool at a very small size as shown here.

Step 2

Let’s start with the child’s face and work our way out just by removing the particles that stand out as shown here.

Step 3

Then let’s work our way through the motorcycle also looking for any detail missing.

Step 4

This last stage requires a long time of observation zooming in and out to find all this missing details.

Step 5

We might have some less obvious blemishes or damage probably caused by liquid or glue that we also need to take care of.

Step 6

In case we find something that requires jumping back to the Clone Tool or Brush Tool just go ahead and do so, like in this case where too much was trimmed off the hair so we bring it back.


Conclusion

Finally, there we have it! A completely restored image that a happy client can take home and frame. In this tutorial, we showed you how to restore a heavily damaged photo. In this process, you learned how to work with the Clone Tool, the Spot Healing Brush, and even how to use the Brush Tool to paint in details that could not be reconstructed from the original photo. We hope that you have learned something from this tutorial and can use these techniques to restore your own photographs.

3D Layers In Photoshop CS6

Final 3D 
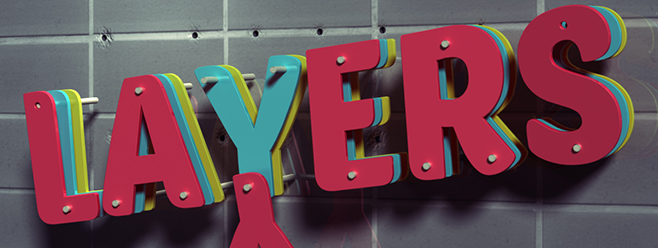
How to make 3D Layers Text Effect in Photoshop CS6

There are so many things that can be done in the Photoshop CS6 3D environment. With all the 3D tools and settings, you can create many amazing 3D effects easily and quickly. This tutorial will show you how to create a simple and fun layered text effect using the 3D capabilities, and will show you some cool tips and tricks that can be used whenever working in the 3D environment in general as well.

Tutorial Assets
1- PoetsenOne font.
2- Tiles Texture – 2.

Step 1
Create a new 1150 x 825 px document, and create the text in Black using the font PoetsenOne, and the font Size 200 pt.

pic1

Next, we are going to create some guides near the top and the bottom of the text. To do so, show the Rulers (View -> Rulers), then click and drag the ruler at the top to create each guide and place it where you want it to be on the text.

The holes we are going to create inside the text will be added along those guides.

pic2

Duplicate the text layer, and make it invisible by clicking the eye icon next to it. Then right click the copy layer and choose Convert to Shape.

pic3

Step 2

Set the Foreground color to White, pick the Ellipse Tool, click the Geometry Settings icon in the Options bar, then set the Fixed Size dimensions to 7, and check the From Center box.
Then, click and drag slightly along the upper guide you created, to place a circle in the center of the first letter’s edges surrounding the guide.

pic4

Click the Combine Shapes icon in the Options bar, then continue adding the circles along both guides for the all letters/letters’ tips.
When you’re done, you can get rid of the guides if you like by going to View -> Clear Guides.

pic5

Step 3

Go to Edit -> Define Custom Shape, and type in a name for the new shape (e.g. Dots).

pic6

Pick the Custom Shape Tool, then scroll down the Custom Shape picker to click the “Dots” shape you’ve just defined.
After that, click the Subtract Front Shape icon in the Options bar, click the Geometry Settings icon, and choose the Defined Size option and un-check the From Center box. This will create the dots in the exact same original size.
Select the text shape layer, then click and drag the dots shape so that the first dot of the shape is placed exactly over the first dot shape you already have. The dots will snap when they are exactly on top of each other.
Once you release the mouse button, the dots will be subtracted from the text shape.

pic7

Set the Foreground color to #b7b7b7, pick the Rectangle Tool, then click and drag to create a rectangle that extends a tiny bit outside the document, and place that rectangle right below the text shape layer.

pic8

Subtract the Dots shape from the rectangle just like you did previously.
In the image below, the other layers are made invisible so that you can see the result.

pic9

Step 4

Select each of the shape layers that you have, then go to 3D -> New 3D Extrusion from Selected Path.

pic10

To access the 3D mesh settings and properties, you’ll need to open two panels: The 3D panel, and the Properties panel (both found under the Window menu).
The 3D panel has all the components of the 3D scene, and when you click the name of any of those, you’ll be able to access its settings in the Properties panel. So make sure to always select the name of the element you want to modify in the 3D panel before you change its settings in the Properties panel.

pic11

Select the Rectangle layer in the Layers panel, then its mesh name in the 3D panel, and change the Extrusion Depth to 10 in the Properties panel.

pic12

Select the text shape layer, then its mesh name in the 3D panel, and change the Extrusion Depth to 5.

pic13

Click the Cap icon at the top of the Properties panel, and change the Bevel Width to 2.

pic14

Select the dots shape layer, its mesh name in the 3D panel, click the Cap icon, then change the Bevel Width to 20, and change the Contour to Cone – Inverted.

pic15

Duplicate the text shape layer twice so that you have 3 text shape layers. Then select all the 3D layers you have, and go to 3D -> Merge 3D Layers. This will place all the 3D meshes in one scene. You can rename the merged 3D layer to anything you like (e.g. Final Scene).

pic16

Step 5

Select the Move Tool. You’ll find a set of 3D Modes for the tool to the right of the Options bar. When you choose one of those, you can then click and drag to perform any changes (on the selected element in the 3D panel).
So click the Current View tab in the 3D panel, then click and drag in any empty area of the 3D scene to change the Camera View, but don’t move any of the meshes yet.

pic17

Next, select each 3D mesh name in the 3D panel, and move it to place the elements in the 3D scene.

pic18

Step 6

Click all the material tabs of the first text shape mesh in the 3D panel, then, in the Properties panel, click the Diffuse texture icon, and choose Remove Texture.

pic19

Change the rest of the settings as shown below. The Diffuse color is #d83054, the Specular is #bbb798, the Illumination is #1d0000, and the Ambient is #454545. But you can absolutely choose any other colors you like for the Diffuse.

pic20

Follow the same steps to change the material settings for the other text shape meshes you have. The only value you need to change is the Diffuse one if you want to use different colors for each layer of text. The color used for the second layer here is #32dae5.

pic21

The color used for the third layer is #bde640.

pic22

As for the dots mesh, after you remove the Diffuse texture, change the settings as shown below. The Diffuse color is #e8dfca, the Specular is #fff7e5, and the Illumination and Ambient colors are set to #000000.

pic23

Step 7

Select the Rectangle’s Front Inflation Material tab in the 3D panel, and change the Specular, Illumination and Ambient colors to #000000. Then change the rest of the values as shown below.

pic24

Click the Diffuse texture icon and choose Edit Texture.

pic25

This will open the texture’s file so that you can modify it.
Place the “Tiles Texture – 2″ image on top of the rectangle shape layer, resize it as needed, then right click its layer and choose “Create Clipping Mask” so that the holes of the shape appear through the texture.

pic26

Go to Image -> Adjustments -> Hue/Saturation, change the Saturation value to -100, and the Lightness to 13.
Save the file (File -> Save), then go to Save As to save the file in the folder of the original file you’re working on using the name “Bump”. Then close it (File -> Close) to go back to the original document.

pic27

Step 8

Click the Bump folder icon and choose Load Texture, and load the “Bump” file you saved in the previous step.

pic28

Click the Bump texture icon and choose Edit Texture.

pic29

Create a new layer on top of all layers, pick the Brush Tool, and choose the “Spatter 46 pixels” brush tip.

pic30

Open the Brush panel (Window -> Brush), and under Shape Dynamics, change the Size Jitter to 25% and the Angle Jitter to 100%.

pic31

Right click the new layer you created and choose Create Clipping Mask, then make the texture layer invisible by clicking the eye icon next to it. Set the Foreground color to Black, set the brush tip size to 25 px, then click once in the middle of each dot. The Shape Dynamics settings will help create results of slightly different sizes and angles.

pic32

The dark color of the brush in the Bump texture will create an illusion of flatter surface areas, that seem to be deeper-looking parts compared to the original surface.
Save the file and close it to go back to the original document.

pic33

Step 9

Select the text mesh name of the very front text layer, then go to 3D -> Split Extrusion. This will make each letter a separate mesh, so that you can move it on its own.
Adjust the camera view so that the text fits within the document in an angle you like.

pic33

Select all the mesh groups in the 3D panel except for the Rectangle group, then pick the Move Tool, and rotate the text slightly so that it looks like its falling off of the wall.

pic34

You can change the camera view to see how the text looks, and make sure that the higher side is attached to its holes in the wall.

pic35

If needed, you can change the Ellipse mesh Extrusion Depth from the Properties panel.

pic36

Step 10

Once you’re done, change the camera view to the final angle that you want to use for rendering later on. Then, from the View drop down menu, choose Save to save that camera view.

pic37

Enter a name for the view and click OK.

pic38

Now whenever you change the camera view then want to go back to the final one, you can click the saved view tab at the bottom of the 3D panel, or choose it from the View drop down menu in the Properties panel.

pic39

Step 11

Choose the Front view from the View drop down menu.

pic40

Zoom in the camera view until you can see the letters clearly. Start selecting some letters from the front layer of text, then rotate, move, and place them out of their original places. The Front view will make getting the letters in place much easier.

pic41

A slight change can be enough for some letters. Not every letter needs to be totally out of its original place. But it’s up to you to decide how to move the letters around depending on the final result you’re looking for.
When you’re done, get back to your final (saved) view.

pic42

Step 12

Time to work on the lighting. Start by clicking the Infinite Light 1 tab in the 3D panel, then, in the Properties panel, change the color to #fffdf5, the Intensity to 80%, and the Shadow Softness to 30%.

pic43

Click the Coordinates icon at the top of the Properties panel, and use the values shown below.

pic44

You can also use the Move Tool to move the light around in the Scene.

pic45

Click the Add new Light to Scene icon down the 3D panel, and choose Point Light.

pic46

In the Properties panel, change the color to #fff8ea, the Intensity to 100%, and the Shadow Softness to 30%.

pic47

The light might seem so bright, but you’ll need to move it so that it touches the wall. Place it on top of the part you like of the text.

pic48

Step 13

Select the Rectangle Extrusion Material, remove its Diffuse texture, and change its settings as below. The Diffuse color is #676767, the Specular is #333333, and the Illumination and Ambient colors are #000000. This will darken up the holes material.

pic49

Select the Background layer, and fill it with the color #362f2d.

pic50

If there’s nothing else you want to change, select the 3D “Final Scene” layer again, then go ahead and render the scene (3D -> Render). The rendering might take some time, but you can stop it by clicking anywhere inside the scene, or pressing the Esc key.

pic51

When the rendering is finished, click the ‘Create new fill or adjustments layer’ icon down the Layers panel, and choose Gradient Map.

pic52

Create the Gradient using the colors #4b0082 to the left and #00a86b to the right. Then change the adjustment layer’s Blend Mode to Soft Light and its Opacity to 50%. This will enhance the coloring and contrast of the final result.

pic53

Conclusion

This is the final result. Photoshop CS6′s 3D Tools and environment are a great way to achieve some amazing 3D effects. You can as well play around with the colors and moving the letters to get different versions of the effect.

pic54

Hope you enjoyed the tutorial and found it helpful.